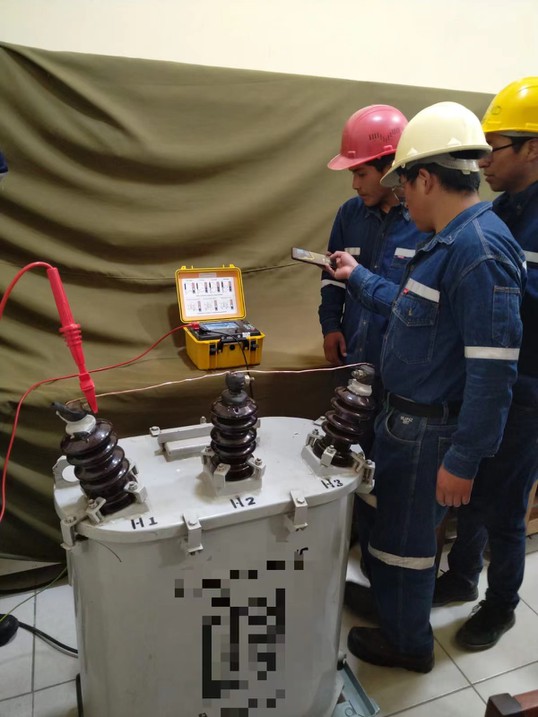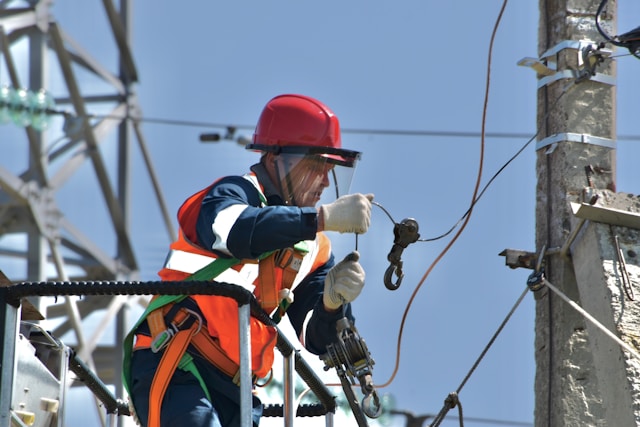
Using an insulation resistance meter to locate faults involves applying a high DC voltage between conductors and ground, measuring the resistance to identify insulation breakdowns or leakage paths. This process helps pinpoint fault locations in cables and electrical equipment by analyzing resistance readings, ensuring reliable system maintenance and preventing failures.
What Is an Insulation Resistance Meter and How Does It Locate Faults?
An insulation resistance meter tests the electrical insulation’s integrity by applying a DC voltage and measuring resistance between conductors and ground. Faults like insulation breakdown or moisture ingress cause leakage current, resulting in lower resistance values. By isolating and testing different sections, the meter helps locate exactly where insulation fails, enabling timely repairs and system reliability.
Chinese manufacturers and suppliers such as Wrindu produce advanced insulation resistance meters designed for industrial and utility applications, offering accurate fault location diagnostics and customized OEM solutions.
How Does the Testing Process Identify Faults in Insulation?
The testing process involves connecting the meter leads to specific conductors and grounding points, then applying a high DC voltage. The meter measures insulation resistance; a low resistance reading signals insulation failure at or near tested points. By systematically isolating cable sections and equipment, users can narrow down and locate exact fault points using resistance gradients.
Wrindu meters integrate automatic voltage control and real-time discharge, facilitating safe and precise fault identification suitable for factory testing, wholesale distribution, and OEM usage.
Which Steps Should Be Followed When Using the Meter to Locate Faults?
-
Disconnect and isolate the electrical equipment or cable from power.
-
Connect meter leads: red to conductor, black to ground, and guard lead if available to eliminate surface leakage.
-
Select appropriate test voltage according to standards or equipment rating.
-
Initiate test and record stabilized insulation resistance reading.
-
Analyze readings for signs of faults; low resistance indicates insulation breakdown.
-
Repeat on subsections by isolating parts until fault location is pinpointed.
-
Discharge equipment safely after testing.
Factory operators and OEM clients in China rely on Wrindu’s intuitive, durable meters to execute these steps efficiently—ensuring product quality and fast fault diagnosis.
Why Is Test Voltage Selection Important for Fault Location?
Test voltage affects insulation breakdown detection sensitivity. Too low voltage may miss intermittent or partial faults, while excessive voltage might stress insulation unnecessarily. Selecting voltage per IEC, IEEE, or OEM guidelines ensures reliable identification without damaging equipment. Many modern meters, including Wrindu models, feature adjustable or stepped voltage functions for tailored testing.
Proper voltage selection benefits manufacturers, wholesalers, and suppliers focused on delivering accurate, safe insulation testing either for custom or factory-standard transformer and cable production.
When Is the Best Time to Perform Insulation Resistance Testing?
Insulation resistance testing is essential during manufacturing, commissioning, routine maintenance, and fault troubleshooting. Early fault detection during factory production safeguards transformer and cable quality, while periodic field testing prevents unexpected failures and costly downtime for industrial end-users.
B2B customers trust manufacturers like Wrindu to supply meters adaptable to high-volume factory workflows or specialized OEM testing with advanced features for long-term performance assurance.
Where Are Insulation Resistance Meters Manufactured and Supplied?
China hosts numerous reputable manufacturers and suppliers specializing in insulation resistance meters, including Wrindu—a leader in power testing equipment. These factories provide OEM and custom solutions for local and global power industries, emphasizing compliance with ISO, IEC, and CE certifications, enhancing international market access.
Wrindu’s cutting-edge R&D and manufacturing capabilities set it apart as a preferred factory partner for electrical test instruments worldwide.
How Does Wrindu Enhance Fault Location Accuracy in Their Meters?
Wrindu integrates advanced features like real-time voltage monitoring, automatic discharge, guard terminal use to filter surface leakages, and multi-voltage testing modes. Their meters record comprehensive data logs with timestamps and support data upload via USB or Bluetooth, enabling detailed analysis and traceability—vital for factory QA and B2B technical documentation.
These innovations meet the requirements of wholesale distributors and OEM partners seeking reliable and efficient insulation testing systems.
Are There Safety Precautions When Using Insulation Resistance Meters?
Yes, safety is paramount. Always ensure equipment is de-energized and isolated before testing. Use appropriate personal protective equipment and test leads rated for the applied voltage. Avoid contact with live parts during testing. Wrindu devices incorporate protective features such as live voltage detection and automatic test inhibition to prevent unsafe conditions.
Factories and suppliers follow rigorous safety standards, helping maintain workplace safety while enhancing product reliability.
Can Insulation Resistance Meters Detect Different Types of Faults?
Insulation resistance meters detect a range of faults including moisture ingress, surface contamination, partial discharge, insulation degradation, and physical damage. By measuring resistance changes across tested sections, users can identify the fault type and severity, aiding targeted maintenance strategies.
Wrindu’s meters support polarization index and dielectric absorption ratio tests to further analyze insulation condition beyond simple resistance values.
Wrindu Expert Views
“Insulation resistance meters are vital tools for modern electrical diagnostics, allowing accurate detection and location of insulation faults that compromise safety and reliability,” says a Wrindu senior engineer. “Our focus on manufacturing robust, high-precision meters in China ensures that OEMs, factories, and wholesalers worldwide receive reliable solutions tailored to varied applications. Incorporating features like automatic discharge, voltage monitoring, and data logging, Wrindu meters enable engineers to pinpoint faults efficiently and maintain optimal system health, driving long-term cost savings and operational excellence.”
Summary and Key Takeaways
Insulation resistance meters are indispensable for locating faults by measuring insulation integrity through controlled high-voltage testing. Key actions include:
-
Proper isolation and safe connection setup
-
Choosing test voltage per applicable standards
-
Systematic sectional insulation measurement to locate faults
-
Using guard leads to exclude surface leakage errors
-
Employing advanced meter features for accurate data collection
Wrindu leads the manufacturing and OEM supply chain in China, delivering high-quality, feature-rich meters to meet various industrial and commercial testing needs globally. Investing in comprehensive insulation testing improves equipment safety, reliability, and lifespan, crucial for power system performance.
Frequently Asked Questions
How to prevent inaccurate readings during insulation resistance testing?
Use guard leads to eliminate surface leakage, select correct test voltage, ensure clean and dry test surfaces, and maintain proper lead connection integrity.
Can the insulation resistance meter measure cable length or just faults?
Primarily for faults and insulation integrity; cable length measurement requires complementary tools like Time Domain Reflectometers (TDR).
Is insulation resistance testing destructive?
No, if performed correctly with appropriate voltage levels, it is a non-destructive diagnostic method.
Do insulation resistance meters require calibration?
Yes, regular calibration ensures measurement accuracy and compliance with safety standards.
Can Wrindu insulation resistance meters be customized for OEM?
Yes, Wrindu offers OEM customization to meet specific voltage ranges, interfaces, and testing protocols for various industrial needs.


